-40%
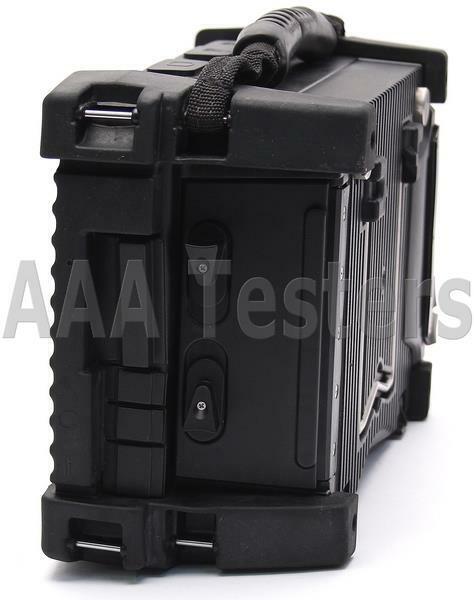
Olympus Panametrics OmniScan MX 16:128 Ultrasonic Phased Array PA Flaw Detector
$ 8848.75
- Description
- Size Guide
Description
ebay templateThe Following Items Are Included:
Olympus OmniScan MX 16:128 Ultrasonic Phased Array Flaw Detector (BC# 9168A-L/T*)
Olympus OMNI-M-PA16128PR Phased Array Module
Ethernet Cable
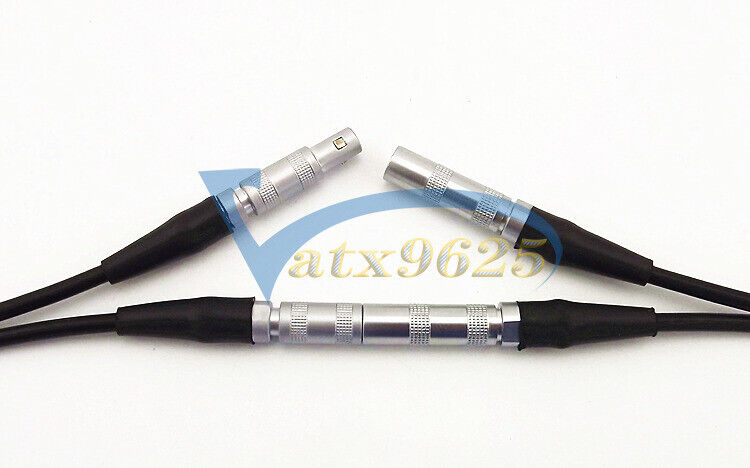
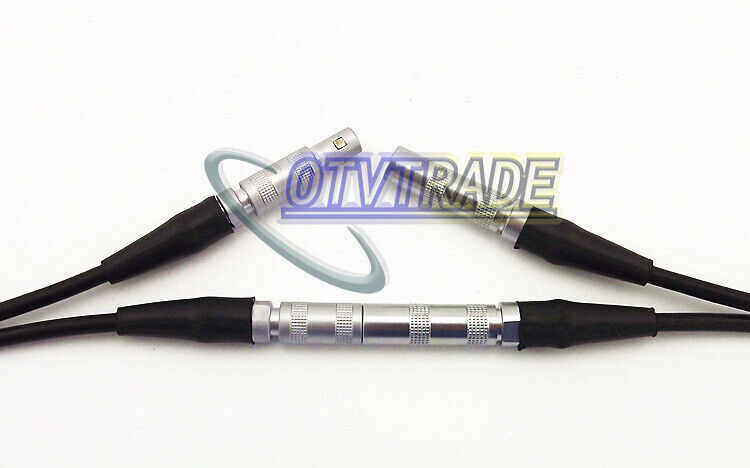
(2) BNC Cables
AC Adapter/Charger
Power Cord
RS232 PC Interface Cable
User Manual On CD-ROM
Carrying Case (G)
BE SURE TO CHECK OUR EBAY STORE FOR OTHER ITEMS!
This Item Has A Current Calibration!
Olympus OmniScan MX 16:128 Ultrasonic Phased Array Flaw Detector w/
Olympus OMNI-M-PA16128PR Phased Array Module
This phased array system is qualified to inspect tubes with diameters ranging from 48 mm to 1524 mm and thicknesses from 5 mm to 25 mm in compliance with ASME Boiler and Pressure Vessel Code Section V.
Includes Carrying Case & Accessories As Listed Above!
Working Condition: Excellent
Condition: Refurbished
Calibrated: Yes
Warranty: 1 YEAR WARRANTY
Olympus OmniScan MX Phased Array Flaw Detector
With hundreds of units used throughout the world, the R/D Tech OmniScan MX is Olympus NDT’s most successful modular and portable phased array and eddy current array test unit. The OmniScan family includes the innovative phased array and eddy current array test units, as well as the eddy current and conventional ultrasound modules, all designed to meet the most demanding requirements of NDT. The OmniScan MX offers a high acquisition rate and powerful software features in a portable, modular mainframe to efficiently perform manual and automated inspections.
Rugged, Portable, and Battery-Operated
The OmniScan is built to work in the harshest field conditions. Its solid polycarbonatebased casing and rubber bumpers make it a rugged instrument that can withstand drops and shocks.
The OmniScan is so compact and lightweight (only 4.6 kg) that it can be carried easily and handled anywhere inside or outside. The OmniScan will run 6 hours with its two Li-ion batteries.
User Interface
The highly legible 8.4-inch real-time display (60-Hz A-scan refresh rate) with a SVGA resolution of 800 x 600 allows you to clearly see defects and details under any light conditions. A scroll knob and function keys make it easy to browse through and select functions. A mouse and a keyboard can also be plugged in for users looking for a more PC-like interface.
Modular Platform
The instrument is a modular platform that allows you to switch among its different test modules on location. The platform detects the new module and the technology supported so that the configuration and test environment are set automatically.
OmniScan Connector
The OmniScan connector has a probe ID feature that enables physical detection and recognition of the probe connected to the mainframe.
Sets the probe to an appropriate frequency to prevent probe damage
Sets C-scan resolution of ECA probes
Loads the correct probe parameters
Typical Applications
Girth Weld Inspection
Olympus NDT has developed a circumferential weld inspection system based on the OmniScan PA for the oil and gas industry. This phased array system is qualified to inspect tube with diameters ranging from 48 mm to 1524 mm and thicknesses from 5 mm to 25 mm in compliance with ASME Boiler and Pressure Vessel Code Section V. The semiautomated system offers better inspection speed and detection, and makes the interpretation of the indications significantly easier.
Pressure Vessel Weld Inspection
The combination of time-of-flight diffraction (TOFD) and pulse-echo techniques means that the complete inspection is done in a single scan, significantly reducing the inspection time when compared to conventional raster scanning or radiography. Inspection results are available instantaneously, allowing you to spot a problem with the welding equipment and fix it right away. Based on our vast experience in the nuclear and petrochemical industries, this system includes all the functions that are needed for code-compliant weld inspections.
Scribe Marks Inspection with No Paint Removal
The Flight Standards Information Bulletin for Airworthiness (FSAW 03-10B), issued on November 2003, report damage along fuselage skin lap joints, butt joints, and other areas of several aircraft caused by the use of sharp tools used during paint and sealant removal.
The OmniScan allows the scribe marks inspection to be done without paint removal which is a huge time saver. The inspection is done in a single pass using 60º to 85º SW sector scans. OmniScan PA is now referenced in the Boeing NTM manuals, 737 NDT Manual, Part 4, 53-30-06, July 2005.
Aircraft Fuselage Inspection
The OmniScan ECA (eddy current array) provides the ability to detect hidden corrosion and cracks in multilayer structures. Currently, material loss of 10% of the lap splice thickness can be detected in aluminum at a depth of 0.2 in. Surface and subsurface cracks can be detected in the skin, at the fastener, or at the lap joint edges.
Ultrasound Inspection
Time-of-Flight Diffraction (TOFD) Testing
TOFD is a technique that uses two probes in pitch-and-catch mode. TOFD detects and records signals diffracted from defect tips for both detection and sizing. The TOFD data is displayed in a grayscale B-scan view. TOFD offers wide coverage and amplitudeindependent sizing compliant with the ASME-2235 code.
One-line scan for full-volume inspection
Setup independent of weld configuration
Very sensitive to all kinds of defects and unaffected by defect orientation
Time-of-Flight Diffraction (TOFD) and Pulse-Echo Testing
While TOFD is a very powerful and efficient technique, it suffers from limited coverage resulting from two dead inspection zones: one dead zone is near the surface, the other is at the backwall.
OmniScan UT allows inspections simultaneously combining TOFD with conventional pulse echo. Pulse echo complements TOFD and covers the dead zones.
TOFD inspection
45º pulse-echo for weld cap inspection on either sides of the weld
60º pulse-echo for weld root inspection on either sides of the weld
0-Degree Testing (Corrosion and Composite)
The 0-degree testing measures time-offlight and amplitude of ultrasonic echoes reflecting from the part into gates in order to detect and measure defects.
C-scan imaging
Full A-scan recording with C-scan postprocessing
Ultrasound Transducers
Olympus NDT offers thousands of transducers in standard frequencies, element diameters, and connector styles.
Contact and immersion transducers
Dual transducers
Angle beam transducers and wedges
Replaceable delay line transducers
Protected-face transducers
Normal incidence shear wave transducers
Phased Array Inspection
Phased Array Technology
Phased array technology generates an ultrasonic beam with the capability of setting beam parameters such as angle, focal distance, and focal point size through software. Furthermore, this beam can be multiplexed over a large array. These capabilities open a series of new possibilities. For instance, it is possible to quickly vary the angle of the beam to scan a part without moving the probe itself. Phased arrays also allow the replacement of multiple probes and even mechanical components. Inspecting a part with a variable-angle beam also maximizes detection regardless of the defect orientation, while optimizing signalto-noise ratio.
Benefits of Phased Arrays
Phased array technology offers the following capabilities:
Software control of beam angle, focal distance, and spot size
Multiple-angle inspection with a single, small, electronically-controlled multielement probe
Greater flexibility for the inspection of complex geometry
High-speed scans with no moving parts
Eddy Current Inspection
Eddy Current Technology
Eddy current (ECT) technology is a noncontact method for the inspection of metallic parts. In this technique, the probe, which is excited with an alternating current, induces eddy current in the part being inspected. Any discontinuities or material property variations that change the eddy current flow in the part are detected by the probe as a potential defect.
Over the years, probe technology and data processing have continuously progressed so that the eddy current technique is now recognized to be fast, simple, and accurate. This is why the technique is widely used in the aerospace, automotive, petrochemical, and power generation industries for the detection of surface or near-surface defects in material such as aluminum, stainless steel, copper, titanium, brass, Inconel®, and even carbon steel (surface defect only).
Benefits of Eddy Current
Eddy current offers the following capabilities:
A quick, simple, and reliable inspection technique to detect surface and near-surface defects on conductive material
Can be used to measure electrical conductivity of the material.
Measurement of nonconductive coating
Hole inspection with the use of highspeed rotating scanner and surface probe
Eddy Current Probes
Olympus NDT standard eddy current probes are available in different configurations:
Bolt hole probes
Surface probes, in various shapes and configurations
Low-frequency Spot and Ring probes
Sliding probes
Wheel probes
Conductivity probes
Speciality probes made for specific applications
Specifications:
Overall dimensions
321 mm x 209 mm x 125 mm
(12.6 in. x 8.2 in. x 5 in.)
Weight
4.6 kg (10.1 lb) (including module and one battery)
Data storage
Storage devices
CompactFlash® card, most standard USB storage device, or through fast Ethernet™ Internal 32 MB DiskOnChip®
Data file size
160 MB
I/O ports
USB ports
3
Speaker out
Yes
Microphone input
Yes
Video output
Video out (SVGA)
Video input
Video input (NTSC/PAL)
Ethernet™
10/100 Mb/s
I/O lines
Encoder
2-axis encoder line (quadrature, up, down, or clock/direction)
Digital input
4 digital inputs TTL, 5 V
Digital output
4 digital outputs TTL, 5 V, 10 mA
Acquisition on/off switch
Remote acquisition enable TTL, 5 V
Power output line
5 V, 500 mA power output line (short-circuit-protected)
Alarms
3 TTL, 5 V, 10 mA
Analog output
2 analog outputs (12 bits) ±5 V in 10 kΩ
Pace input
5 V TTL pace input
Display
Display size
8.4 in. (diagonal)
Resolution
800 x 600 pixels
Number of colors
16 million
Type
TFT LCD
Power supply
Battery type
Smart Li-ion battery
Number of batteries
1 or 2 (battery chamber accommodates two hot-swappable batteries)
Battery life
Minimum 6 hours with two batteries; minimum of 3 hours per battery in normal operation conditions
DC-in voltage
15 V – 18 V (min. 50 W)
Environmental specifications
Operating temperature
0°C to 40°C (35ºC with 32:128 PA)
Storage temperature
–20°C to 70°C
Relative humidity
0–95% non condensing. No air intake, splashproof design.
Ultrasound Module Specifications
Overall dimensions
244 mm x 182 mm x 57 mm (9.6 in. x 7.1 in. x 2.1 in.)
Weight
1 kg (2.2 lb)
Connectors
LEMO® 00 (2, 4, or 8)
Pulser/Receiver
Number of pulsers/receivers
2, 4, or 8
Pulser
Pulse output
50 V, 100 V, 200 V, 300 V ±10% (variable pulse width)
Pulse width
Adjustable from 30 ns to 1000 ns ±10%, resolution of 2.5 ns
Fall time
Less than 7 ns
Pulse shape
Negative square wave
Output impedance
Less than 7 Ω
Receiver
Receiver gain range
0–100 dB, by steps of 0.1 dB
Maximum input signal
20 V p-p (screen at 128%)
Minimum sensibility
200 µV p-p (screen at 128%)
Noise referred to input
160 µV p-p (26 µV RMS) (128%)
Input impedance
50 Ω
Input filter (100% bandwidth)
Centered at 1 MHz (1.5 MHz),
centered at 2 MHz (2.25 MHz),
centered at 5 MHz (4 MHz),
centered at 10 MHz (12 MHz),
centered at 15 MHz,
centered at 20 MHz,
0.25–2.5 MHz, 2–25 MHz BB
Bandwidth of the system
0.25–32 MHz (–3 dB)
Rectifier
Both, positive, negative
Mode
PE (pulse-echo), PC (pitch-and-catch), TT (through-transmission). In P-C mode the maximum number of pulsers equals the number of channels/2
Smoothing
Digital
DAC
Number of points
16
DAC range
Up to 40 dB
Maximum gain slope
20 dB/µs
Data acquisition
A-scan acquisition rate
6000 A-scans/s (512-point A-scan)
Maximum pulsing rate
1 channel at 12 kHz (C-scan)
Data processing
Real-time averaging
2, 4, 8, 16
Gates
Quantity
3: I (synchro), A and B (measure)
Synchronization
I, A, B referenced on main bang, A and B referenced on gate I (postsynchronization)
Data storage
A-scan recording (TOFD)
6000 A-scans/s (512-point A-scan) (3 MB/s transfer rate)
C-scan type data recording
12 000 (A1, A2, A3, T1, T2, T3) (3 gates) 12 kHz (lower frequency for corrosion mapping)
Data visualization
Refresh rate
60 Hz
Data synchronization
On time
1 Hz–12 kHz
On encoder
On 1 or 2 axes divided into 1 to 65,536 steps
Alarms
Number
3
Conditions
Any logical combination of gates
Signal
Amplitude or TOF of gate A or B
Phased Array Module Specifications
Overall dimensions
244 mm x 182 mm x 57 mm
(9.6 in. x 7.1 in. x 2.1 in.)
Weight
1.2 kg (2.6 lb)
Connectors
1 OmniScan connector for phased-array probes 2 BNC connectors (1 pulser/receiver, 1 receiver for conventional UT) (BNC not available on models 32:32 and 32:128)
Number of focal laws
256
Probe recognition
Automatic probe recognition and setup
Pulser/Receiver
Aperture
16 elements*
Number of elements
128 elements
Pulser
Voltage
80 V per element
Pulse width
Adjustable from 30 ns to 500 ns, resolution of 2.5 ns
Fall time
Less than 10 ns
Pulse shape
Negative square wave
Output impedance
Less than 25 Ω
Receiver
Gain
0–74 dB maximum input signal 1.32 V p-p
Input impedance
75 Ω
System bandwidth
0.75–18 MHz (–3 dB)
Beam forming
Scan type
Azimuthal and linear
Scan quantity
Up to 8
Active elements
16
Elements
128
Delay range transmission
0–10 µs in 2.5-ns increments
Delay range reception
0–10 µs in 2.5-ns increments
Data acquisition
Digitizing frequency
100 MHz (10 bits)
Maximum pulsing rate
Up to 10 kHz (C-scan)
Acquisition depth
29 meters in steel (L-wave), 10 ms with compression. 0.24 meter in steel (L-wave), 81.9 µs without compression
Data processing
Number of data points
Up to 8000
Real-time averaging
2, 4, 8, 16
Rectifier
RF, full wave, halfwave +, halfwave –
Filtering
Low-pass (adjusted to probe frequency), digital filtering (bandwidth, frequency range)
Video filtering
Smoothing (adjusted to probe frequency range)
Data storage
A-scan recording (TOFD)
6000 A-scans per second (512-point 8-bit A-scan)
C-scan type data recording
I, A, B, up to 10 kHz (amplitude or TOF)
Maximum file size
Limited by memory size
Data visualization
A-scan refresh rate
Real-time: 60 Hz
A-scan refresh rate
Up to 40 Hz
Data synchronization
On internal clock
1 Hz – 10 kHz
On encoder
On 1 or 2 axes
Programmable time-corrected gain (TCG)
Number of points
16 (1 TCG curve per channel for focal laws)
Alarms
Number of alarms
3
Conditions
Any logical combination of gates
Analog outputs
2
OMNI-M-PA16128PR Specifications
Pulser
Voltage
Low: 40V
High: 80V
Pulse width
Adjustable from 30 ns to 500ns; resolution of 2.5ns
Fall time
<10ns
Pulse shape
Negative square pulse
Output impedance
<25Ω
Receiver
Gain range
odb to 74db maximum input signal 1.32 Vp-p
Input impedance
50Ω (pulse-echo channel)
150Ω (pitch-catch channel)
System bandwidth
0.75 MHz to 18 MHz (-3dB)
Beam formation
Scan Type
Sectorial and linear
Aperture
16 elements
Number of elements
128 elements
Number of focal laws
236
Delay range transmission
0us to 10 us in 2.5 ns increments
Delay range reception
0 us to 10 us in 2.5ns increments
For full Olympus OMNIScan MX Ultrasonic Flaw Detector product specifications, please click here:
Olympus OMNIScan MX
Please check our Huge Inventory with savings of up to 80% off of retail on Cat5/5e/6 LAN Cable Certifiers and Fiber Optic OTDR's, Fusion Splicers, CATV Meters, Fiber Optic Kits, Sources, Meters, Tools, Network Analyzers and much more. Here is a Link to our
Ebay Test Equipment Store
. All of our Test Equipment is backed with a Full Warranty and unbeatable customer support & service. Please don't hesitate to
contact us
for a Quote on Something you don't see in our inventory, sometimes we have items that may have not been listed or processed yet.
Test Equipment Store Offers a wide range of Refurbished Telecom/ Datacom Tools and Test Measurement Equipment. Which includes Fiber Optic Test and Splicing tools, Fusion Splicers, OTDRs, Copper and Fiber Cable Certifiers, CATV Test Equipment, Cable and Antenna Analyzers, Network Analyzers and much more!
We carry a large inventory of quality refurbished and used test equipment from all the major manufacturers. If you are looking for multiple quantities or if we don't have a listing for a particular item that you are looking for. Please contact us as it may be fresh inventory waiting to be listed or we'll be glad to find it for you at the best price possible and put up an eBay listing for you!
We Ship World Wide!
We will attempt to ship your item(s) within 24 hours after payment has been received. To get a real-time shipping quote to your destination, enter your country and zip / postal code information into the shipping calculator and click "Get Rate".
Many countries impose their own customs, duties, tariffs, taxes, etc. on items being shipped from a foreign country. We do not cover those cost's and we recommend that you contact your countries customs agency for that information.
We Offer Multiple Quantity Price & Shipping Discounts, Email Us If You Are Interested In Larger Quantities.
We accept credit card payment transactions via the online checkout system! The checkout process is designed so that it communicates with the merchant to confirm that payment has been made and cleared. Other methods of payment are outlined through the online checkout process. Winning bidders must contact us within 3 days after auction close if special payment arrangements are needed.
Your payment is expected within 5 days after the auction close. Unpaid auctions will be forfeited after 5 days of the auction close and the Item(s) will be relisted for sale.
Items will be shipped within 24 hours (1 Business Day) upon receipt of payment from the winning bidder. (Certain orders may take longer for processing due to comprehensive final service inspections)
A Shipment Tracking number(s) will be provided to inform Buyers of their expected ETA (Estimated Time of Arrival). Tracking number(s) will be provided the same day as order shipment.
Thank you
ALL MAJOR CREDIT CARDS & PayPal ACCEPTED
Sell Smarter with Kyozou.
Inventory and Ecommerce Management


